

Germination and rooting of grape cuttings: how to properly plant and grow grapes from a cuttings
Only for the benefit of grapes to grow it from cuttings in the spring. After all, this is the most favorable moment for reproduction of planting material in order to obtain the required quantity and quality of seedlings.
About when to start sprouting cuttings, about the various methods of germination, as well as planting grape cuttings in pots at home and planting them directly in a greenhouse or in open ground, will be discussed in our article.
Content
- 1 How to pick a good grape variety
- 2 When to start germinating grape cuttings
- 3 How to prepare grape cuttings for spring planting
- 4 Ways to germinate grape cuttings
- 5 Further cultivation of germinated grape cuttings
- 6 When and how to plant vegetative cuttings (seedlings) of grapes in open ground
- 7 Features of caring for planted grape cuttings in the open field
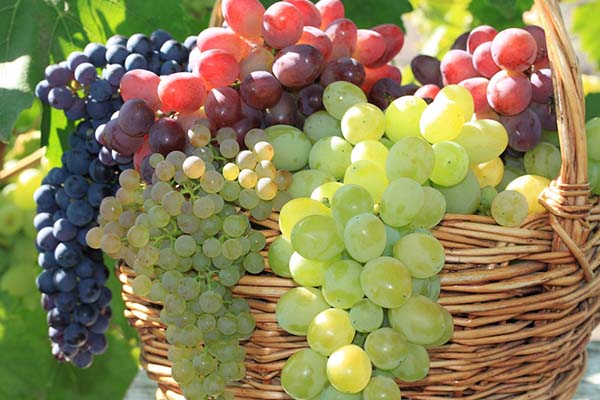
How to pick a good grape variety
Note! The site already has a number of detailed review articles on the most popular and best grape varieties:
- General article on the best grape varieties.
- The best table varieties.
- Wine varieties.
- The best early varieties.
- Black (blue) varieties of table and wine grapes.
- Pink varieties of table and technical.
- White varieties.
When to start germinating grape cuttings
It is difficult to name a specific date when it is already possible to get out and start germinating grape cuttings, because there are several very important factors on which your terms will depend specifically, namely:
- how long will germination take;
Note! If you can maintain optimal temperature conditions for germination, the cuttings will be ready for planting much earlier than if they germinate under less suitable conditions.
- depending on the method of germination (if with kilchevanie, then you can plant earlier; if without kilchevat, then - 5-7 days later);
- when the warm season begins in your region (the earth warms up enough, at least up to +10 degrees);
- where you will plant (if in your personal plot, i.e. you live in a private house, then you can do it earlier; if at the dacha where you visit 1-2 times a week, then later).
The fact is that in the event of recurrent spring frosts, you must quickly respond and cover the seedlings, and this cannot always be done if your summer cottage is far from home.
As a result, from the moment of germination of cuttings to the planting of already growing grape seedlings, on average it takes about 2.5 months (70-80 days).
Thus, if you live:
- in the south of Russiathen get cuttings for germination from the repository you canlate January-early Februaryto startplant young seedlings in open ground, already starting from mid-late April.
- in the middle lane (Moscow region) cuttings for germination should be taken out much later, somewhere late February-early Marchso that plant in the ground in the second half or end of May.
Video: when to start germinating grape cuttings
Is it possible to cut grape cuttings in spring
Many novice gardeners ask themselves the question: "Is it possible to cut grape cuttings in spring?"
Of course, you can, but it will be relatively problematic to do this:
- if you do not live in a private house, then in winter and early spring you will have to go to the country;
- table grapes, as a rule, whole covering;
- in February-March there is usually still snow;

- even if you deliberately left long vines (in order to remove the shelter in the spring and cut the cuttings), then there is still the possibility of frost damage to the eyes, their drying out, etc.
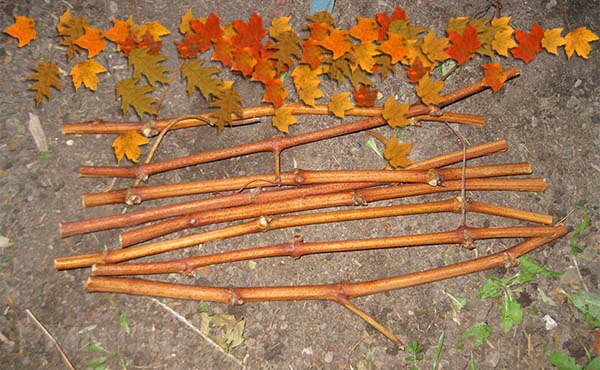
Therefore, grapes are cut in autumn.
By the way! About, how to properly cut grapes in autumn, read in in this detailed article... In general, the procedure is carried out in the same way in spring.
How to prepare grape cuttings for spring planting
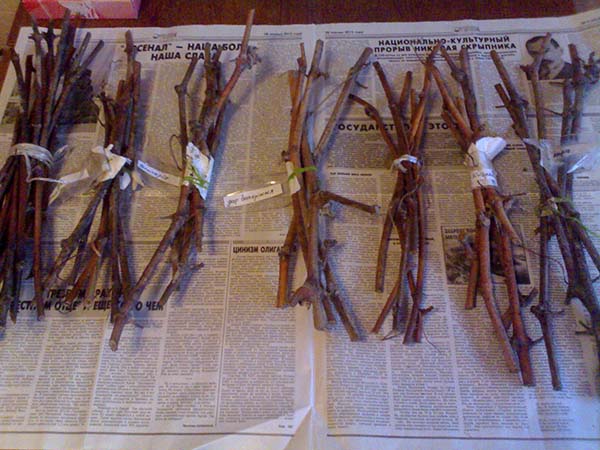
Working with grape cuttings laid in the fall for storage, first of all, you should start with the following preparatory activities:
- Get the cuttings out of their storage and simplyput in the room, giving 2-3 days for adaptation at home;
- Assess their condition, in other words, make sure they are of good quality. To do this, first conduct a visual inspection - there should be no darkening, stains, mold or other signs on the cuttings.
- If the cuttings are slightly mildewed, then they should berinse in a pink solution of potassium permanganate.
- Some growers regardless of the condition of the cuttings, they are disinfected (all in the same potassium permanganate solution for 30 minutes, and then washed under running water).
And already directly when cutting cuttings and updating slices you have to make sure that the wood inside is light green (= alive)rather than black or brown (= dry, dead).
- Slice.
By the way! A shank is usually called a shank, which has 3 well-developed buds (more precisely, an eye).
The vine, as a rule, is initially cut and stored in a sufficiently long form (cuttings 60-80 cm long are made). In this form, cuttings are better stored, remain more viable and do not dry out, especially their ends.
What are requirements apply to the cutting, which can be put on germination, or rather, how it cut and prepare properly:
- Shaft length should be order 15-25 centimeters, while he may have from 2 to 3 eyes.
- Naturally, you need properly cut the cuttings themselveseither just update all bottom cutsif they were short at once.
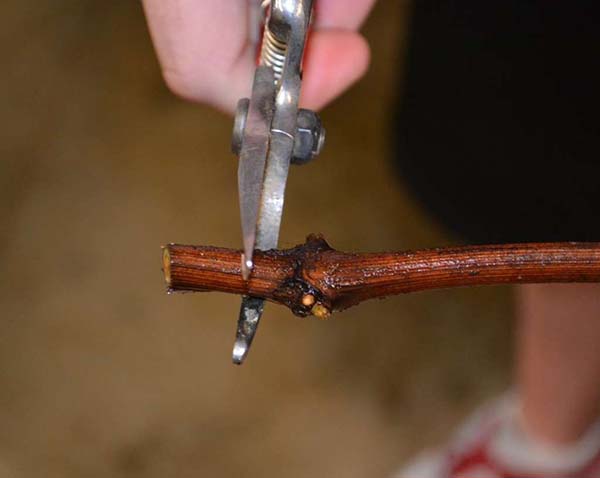
Slices must be smooth, in other words, good in advance sharpen your secateurs or knife.
Bottom cut it should be straight and be under the eye (stepping back 1 cm from it), aupper the cut should be oblique (point towards the kidney) and be above the eye (2-3 cm above it).
If you find it difficult to determine which is the top and which is the bottom, then here is a cheat sheet for you: the top is always slightly thinner than the bottom, and the eyes look exactly up.
- Further recommended cut off all lower eyes, they also say - to blind (you will get rid of only real kidneys, there will be 2-4 sleeping more inside).
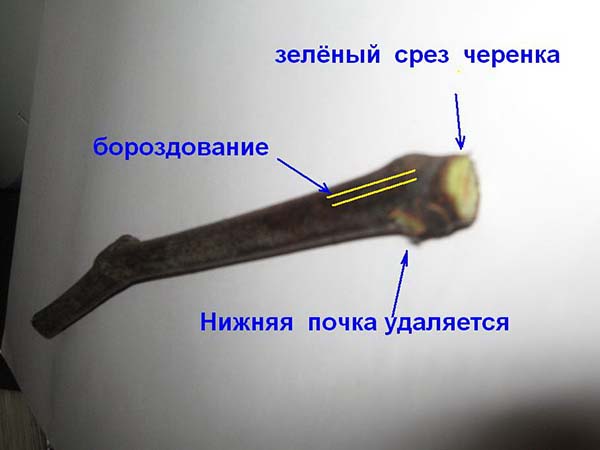
This is done so that they (lower buds) do not wake up during germination and do not take food from the upper ones, which should give shoots.
- If you have many different varieties, then it's time sign cuttings (for example, a permanent marker at the top).
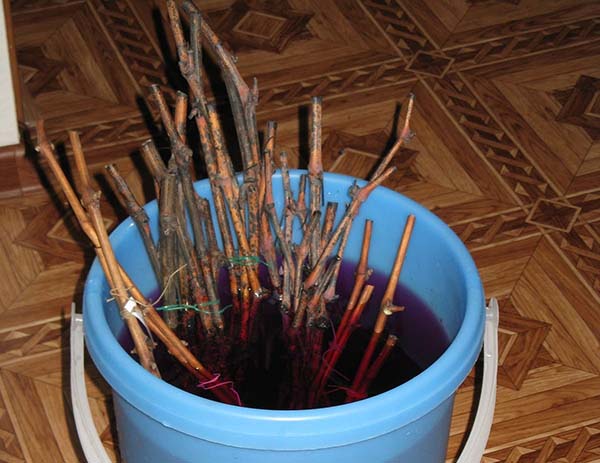
- Required soak, in other words, the shanks should swim in water for 1-2 days (it is advisable to use thawed, rain or at least settled water).
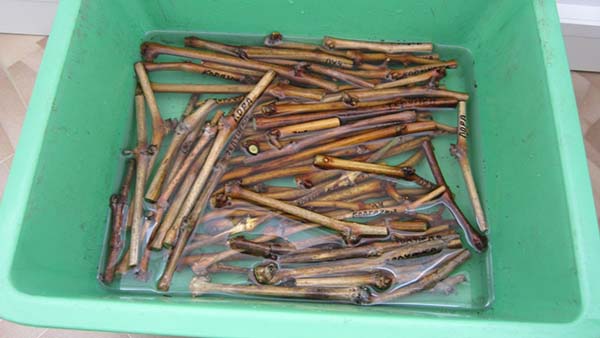
You can tie the shanks into a bunch or just throw them into a bucket (another suitable container). Or put the lower part (heel) in a container of water so that the cutting is 1 / 3-1 / 2 in water.
- Some growers additionally recommend (optional procedure) from above pour the handle (upper part with eyes) with wax or paraffin (paraffin).
Waxing delays the germination of the eye for 5-7 days, so that at this time all the growth energy of the cutting is directed to the formation of roots.
- You can and even need to spend furrowing - make 2-4 shallow (you need damage only the bark) longitudinal scratches (grooves).

The furrowing procedure stimulates well the formation of roots (wound tissue).
- Next (again, if you wish - to heighten the effect), putinto a solution of heteroauxin, root, epinor any other stimulant of root formation - rooting (according to the instructions). By the way, as an option, you can and just powder the lower part of the cutting with powder (so called heel).
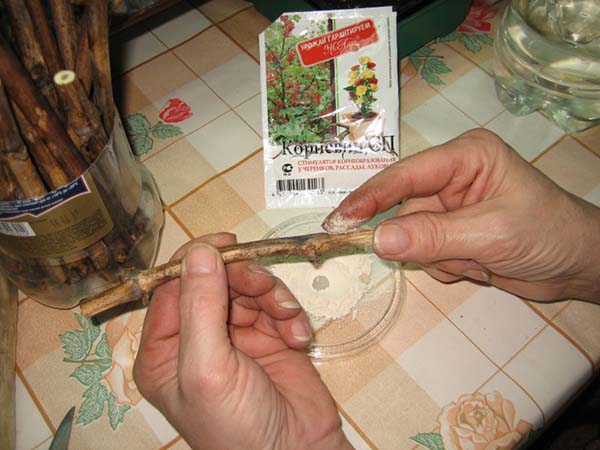
By the way! Natural root formation stimulant is honey solution (1 tablespoon per liter of water).
- Put the cuttings for germination. Read about the different methods below.
Interesting! Some growers recommend first carry out the soaking procedure, and only then cut the cuttings, update slices and dazzle the lower kidneys, etc.
Video: preparing grape cuttings for germination
Another interesting video on preparing cuttings for rooting:
Ways to germinate grape cuttings
Important! Cuttings of different grape varieties begin their growing season at different times, so do not be surprised if one stem has already begun to germinate, and the other will still sit and not give roots, in other words, the rooting rate can be very different.
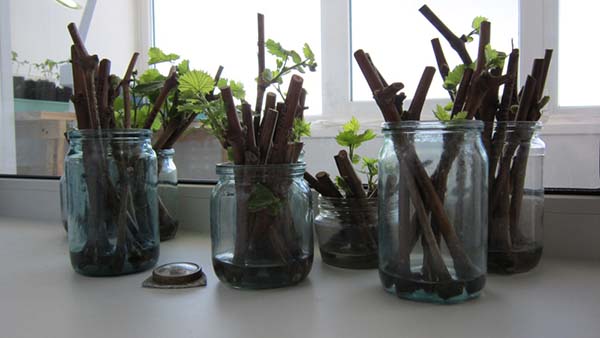
In a jar of water
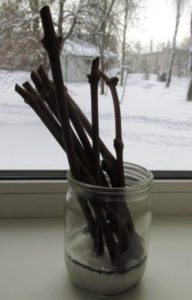
- Pour 0.5-1.5 cm of water into a container (as a rule, a 0.5-1 liter can is used).
- Water preferably use rain, better thawed or at least defended.
- The water temperature in the jar must be higher than the air temperature (up to +20 degrees - the lower, the better), but not higher than + 24-26 degrees (according to other sources, up to +28 degrees). Only in this case (the water temperature is higher than the ambient air), the roots are formed earlier than the vegetative part, otherwise leaves will first grow, which will inhibit the formation of roots!
By the way! It will be very useful to immediately do bank mark, in other words, set water level, which should be maintained: before bud break, it will take about 1 time in 2-3 days, and when the leaves begin to grow, then 1 time in 1–2 days. And better not just add, but completely change the water.
Advice! To change water less oftenyou can put in a jar a couple of pieces of charcoal (or an activated carbon tablet), and then a layer of cotton wool (for hygroscopicity).
- Place the cuttings in water. Moreover the stalk should be in water to the middle of the knot (eye), i.e. maximum - 1-1.5 centimeters in water.
Worth knowing! Air is always needed for the development of roots, therefore, if the cuttings are half their length in water, then there can be no question of any formation of roots. After all, roots are primarily formed at the water-air border.
- Itself put the container in a bright place - on the window, more precisely, on the windowsill, or even better - straight per battery and periodically do not forget to open the ventilation window (to lower the temperature).
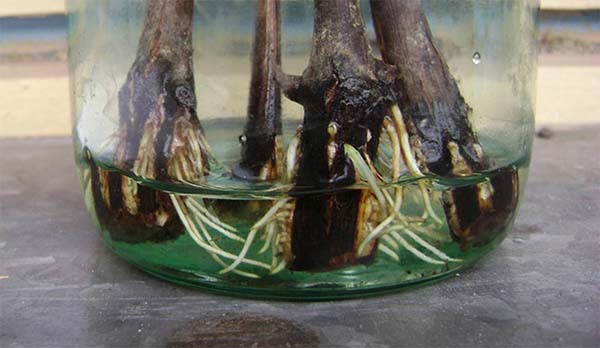
- About after 3-4 weeks roots will begin to appear.
Note! However, often (especially if you do not comply with the above requirements), buds begin to swell and open before roots are formed... In general, this is fine, but there are some things you can try:
- Alternatively, you can break the first swollen bud, and the spare one will begin to bloom only after a week.
- If you oversleep and leaves are already forming, then you can pinch one of them.
However! Some growers believe that the development of the root and leaf parts should go smoothly.
- When the roots will already be 0.5-1 cm each (maximum - up to 2 cm), cuttings sprouted in water can plant in the ground (in a transparent pot, bottle, greenhouse or directly into the open ground under a bottle).
Important! You should not overexpose, tk. the roots are very fragile, which means that the longer ones can simply break off during transplantation.
Video: germinating cuttings in water
By the way! The care of cuttings that are already being germinated in water is described in great detail and shown in this video:
Video: sprouting shanks in water - care rules
In a jar of water with aeration
In general, this method repeats and supplements the previous one, namely, for aeration (oxygen enrichment) of the water, the most ordinary compressor for an aquarium is used.
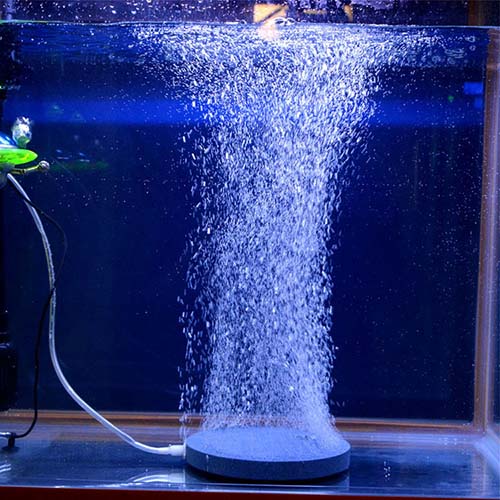
By enriching the water with oxygen the root formation process is noticeably accelerated.
In addition, with this method of germination, you no need to change water, it will be enough just top up... But putting charcoal or activated carbon is still worth it.
Important! Should not use as aerator ozonizer.
The aerator itself is recommended to be turned on a day only a few (3-4) times for 30-60 minutes. since excess oxygen in water adversely affects root formation.
By the way!Some advise, instead of an aerator, put a heater for aquariums on the bottom and give the temperature + 25-26 degrees, i.e. it will be a kind of kilchevaya (about what it is, read on)
You can see more details and learn about how to germinate cuttings with aeration in the following video:
Video: germinating grape cuttings in water with aeration
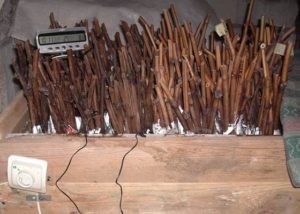
Kilchevanie
In general, in the paragraph "In a jar of water" it has already been said that in the root zone need to create a favorable temperature for their growth (+ 20-25 degrees), and in the area of the eyeson the contrary - unfavourable conditions (lowered temperature - preferably about 0 .. + 5 degrees). Actually, this is called kilchevaya procedure.
However, ideally, this procedure should be carried out using a special device - kilchevator, which you can make yourself.
Advice! As a rule, when germinating cuttings in a kilchevator, sawdust (or moss)which should always (constantly) be wet, but not wet (so that water directly flows from them, or rather, so that when squeezed, it does not drip from them).
He (kilchevator) can look differently:
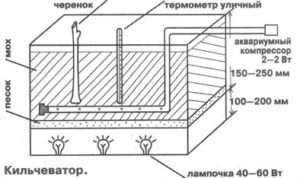
More details about the device of the kilchevator you can watch in the following videos:
Video: grape cuttings
Another interesting video about the use, creation and construction of a kilchevator:
Video: kilchevator for growing cuttings
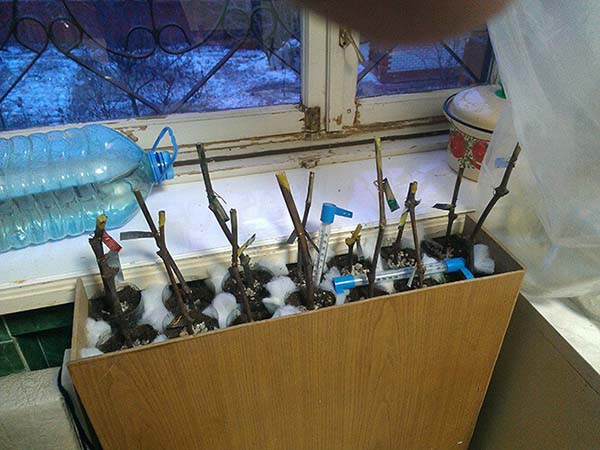
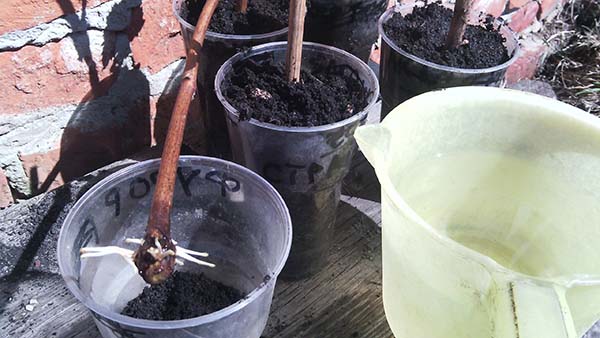
In the ground
You can try to root the cutting immediately in the ground, while you must use a loose soil mixture (for example, taking peat, humus, turf soil and sand in equal parts).
All actions are similar to germination in water, only after you process the heel (lower part) of the cutting in the root former, it will need to be buried in a previously made hole (1/3), covered and compacted, and then watered. Place in a bright place, preferably on a windowsill. Courting = watering and then planting in the ground when the seedling is strong enough and the time is right.
By the way! Some growers use peat tablets, but more on that later.
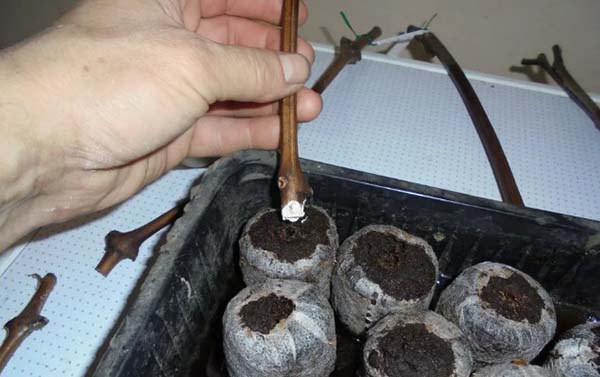
In a peat tablet
Again, all actions are similar to germination in water or planting in the ground. In other words, after you process the heel (lower part) of the cutting in the root or any other root growth stimulator, then you will need to:
- Insert the handle into the previously soaked peat tablet until it stops.
Advice! The tablets should be taken the largest (at least 5 cm in diameter, and even better - 7 cm).
- Wrap a peat tablet and part of the cutting with cellophane (or film), and then fix it on top with electrical tape or tape.
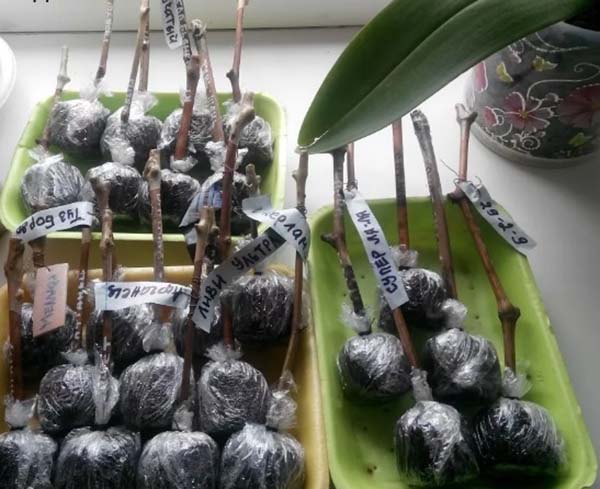
- put on a windowsill, or even better on a battery (and not necessarily vertically, you can also horizontally), so that in root zone create a favorable temperature for their growth (+ 20-25 degrees), and in the area of the eyeson the contrary - unfavourable conditions (lowered temperature), in other words, to carry out kilchevka (described above).
Video: how to root a grape stalk in a peat tablet
According to gardeners, the main advantage of germinating grape cuttings in peat tablets is the speed of the process. This usually takes only 2 to 3 weeks.
When you notice that the cuttings have sprouted roots, you will need to transplant the sprouted cutting along with the peat tablet into a larger container (a pot, a cut plastic bottle).
Video: the result of rooting and transplanting into a new container
In potatoes
Note! According to many gardeners, the way very controversial and ineffective, more precisely, completely useless... It can only be used, so to speak, for the sake of interest, or rather for the sake of "fun". You should not use it seriously, just try it once if you are really interested in it.
What needs to be done to put cuttings in potatoes for germination:
- take a small potato tuber;
- remove all his eyes (so that they do not grow in the ground);
- make a hole for the handle;
- stick in the handle;
- dig into the ground (in a pot);
- put on the windowsill, or better directly on the battery (for drinking);
- wait until something happens, but 99% that nothing….
Interesting! In theory, the cutting should take root when the potato rots. In other words, at first the tuber maintains moisture in the cuttings, then it rots, and, so to speak, makes it possible for the roots to grow.
Video: negative experience of rooting grape cuttings in potatoes
Further cultivation of germinated grape cuttings
With grape cuttings that have sprouted roots, you can do the following:
- plant in pots for further rooting and their transformation into full-fledged vegetative seedlings;
- plant immediately in a greenhouse or open ground.
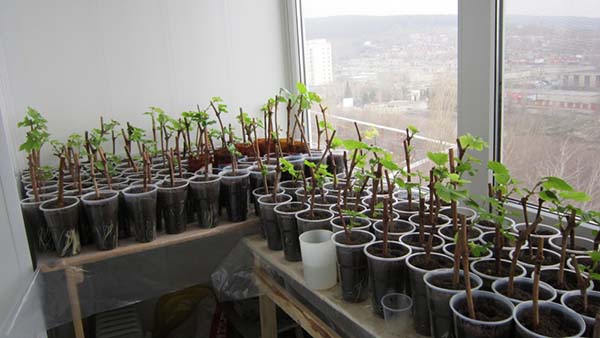
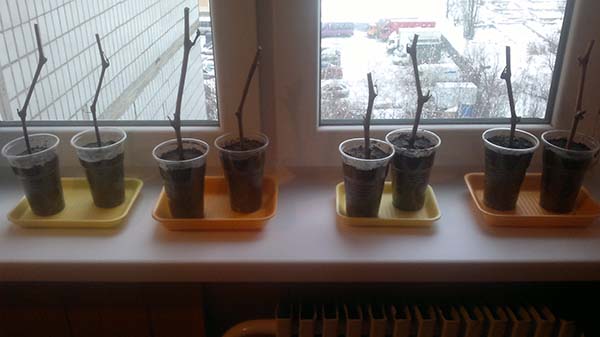
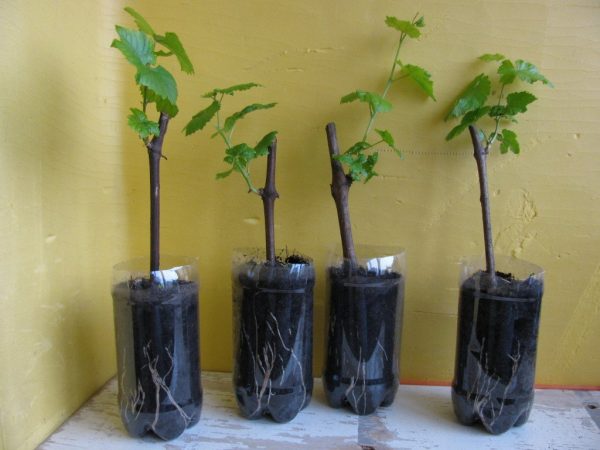
Planting cuttings in pots at home
Planting capacity should be high enough - 30-40 cm, i.e. a 1-1.5 liter cut plastic bottle is ideal.
At the bottom, you should definitely do drain holesso that excess moisture comes out, otherwise the stalk may rot.
Advice! In addition to the drainage holes at the bottom, small side holes.
Remember! Stagnation of moisture threatens the most negative consequences for the roots.
Soil mix for transplanting with cuttings with roots, there must be loose. You can of course take and mix peat, humus, turf soil and sand in equal parts (or as an option - black soil, humus, sand and sawdust), but it is much easier to use any universal primer and loosen it with the same perlite.
You can also use soil with biohumus and forest land (it is already loose, but sour, so you should deacidify it by adding a little wood ash).
It is advisable to ignite the soil mixture itself, in order to get rid of all possible fungal diseases, namely, it must be heated in the oven for 1.5-2 hours at a temperature of 180-200 degrees.
Step-by-step instructions for planting a sprouted cuttings in a pot:
- Fill the container 1/3 or 1/2 with soil.
- Carefully (in no case can you break off the roots) place the cutting.
- Fall asleep with soil.
- Press down lightly.
- Spill it with water, wait for the moisture to reach the roots, add more soil and gently press down again.
- Bet in a warm and bright place (on a sunny windowsill).
The higher the temperature, the faster the development will be, the best option is + 22-27 degrees (but not lower than +20).
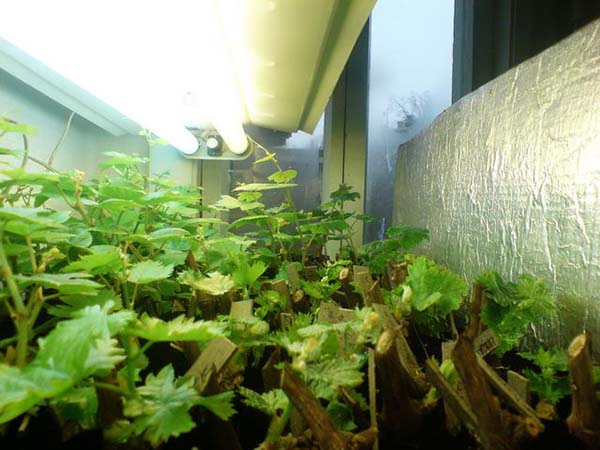
If you don't have a sunny windowsill, but you have specially equipped place for growing seedlings with lighting, then it is better to put it there, because a lot of light is required for the development of green mass (12-14 hour daylight hours).
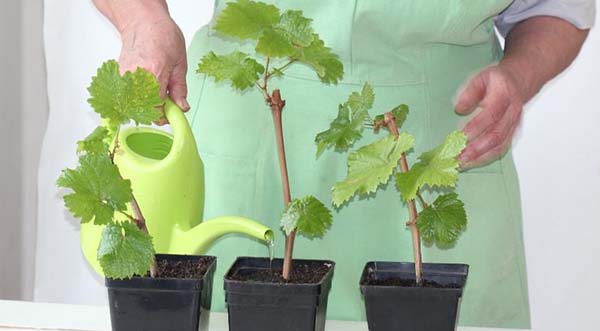
Otherwise, all you have to do now is make sure that the ground was constantly slightly damp, in other words, periodically water (always with warm water, not lower than +20 degrees), while avoiding overdrying or waterlogging.
Advice! Grapes like one-time, powerful (but moderate) watering, rather than light daily watering.
If desired and necessary, you can also additionally feed your vegetative seedlings, spilling one of the nitrogen fertilizers, but if you made a nutritious soil mixture with humus and black soil, then this is not at all necessary, you definitely do not need to overfeed.
Video: planting sprouted seedlings (cuttings) of grapes in bottles (pots)
We also highly recommend watching the following rather informative video about planting in a container and further growing vegetative cuttings (seedlings) of grapes before planting in the ground:
Video: planting grape cuttings in containers (containers) after germination in water
Planting cuttings directly in a greenhouse or open ground
Rarely enough, but sometimes some experienced growers immediately plant sprouted cuttings in a greenhouse or open ground, always on a warm bed. However, this only makes sense if you live in the South of Russia. In the conditions of the Central strip (Moscow region), this method is hardly applicable.
Another thing is when the greenhouse warms up enough, you can begin to take out containers with vegetative cuttings there.
When and how to plant vegetative cuttings (seedlings) of grapes in open ground
A high-quality vegetative stalk (more precisely, already a seedling) of grapes must have the following characteristics:
- have at least 7-8 leaves;
- the length of green shoots should be at least 15-20 cm;
- have a developed root system (at least a 1-liter container in which the cutting was grown must be completely filled with its roots).
In no case you cannot immediately take out a young green seedling (formerly a cutting) outside and plant it in the groundotherwise he will simply die. Plant need to necessarily temper, and doing it gradually: first, take out for 20 minutes, then 40, and so on for 7-10 days. During this time, the seedling will pass adaptation to new conditions.
Concerning timing, then, as mentioned earlier, you can plant when the ground (to the planting depth) will warm up to +10 degrees and the threat of return spring frosts will pass. IN Depending on the region, this happens at different times:
- So,in the south of Russiacan be planted starting from mid to late April.
- In the middle lane (Moscow region) — in the second half or end of May.
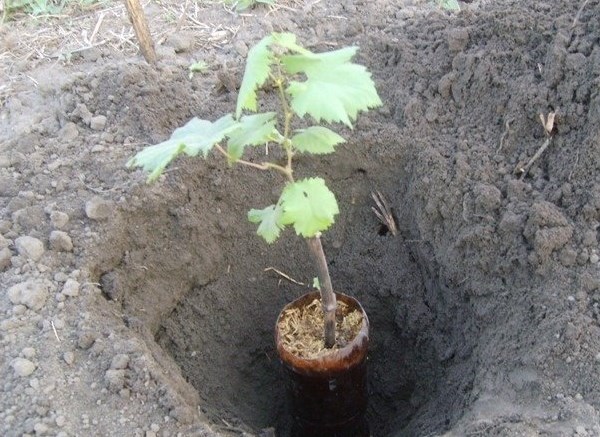
The planting itself is standard, like that of a seedling with a closed root system, in other words, you take and transfer it to a pre-prepared planting pit with a lump of earth, carefully, in no case removing an earthen lump from the roots.
Note! The site already has a detailed article about the spring planting of grape seedlings.
Video: planting a vegetative seedling in open ground
Video: planting vegetative grape seedlings in the ground (according to Puzenko)
Features of caring for planted grape cuttings in the open field
Naturally, in the first year, a young seedling should be carefully monitored and looked after.
After planting, it is desirable to shade the bush at least a little for the first 10-15 days, even if it is hardened, since the active sun will still burn out chlorophyll, and the leaves will wither.
In case of unexpected return frosts -a slight decrease in temperature (to zero) you should throw spunbond over the seedlings. What if severe frosts expected (up to -3 ..- 5 degrees), then the cover should be made even more solid.
So that you do not have such problems, it is recommended to plant when the threat of return frosts has passed.
More details about caring for grapes read in the following article:
- General recommendations for preparing grapes for winter.
- Autumn processing of vines before winter.
- How to prune bushes in the fall.
- How to properly insulate (cover) grapes for the winter.
- Major diseases of grapes and methods of prevention and control: mildew, oidium, gray rot, anthracnose.
- Grape mite (itch).
- General Spring Vine Care Activities.
- Spring pruning.
- Spring treatment against diseases and pests.
- Graft.
- Spring feeding of grape bushes.
- Tying bushes to a trellis.
- Green operations: chasing, pinching, pinching.
In the spring, there is a chance to propagate your favorite grape variety with cuttings. When to do this, in what effective ways, as well as many other nuances of the correct cultivation of grape seedlings from shanks - all this has now become known to you. For the cause!
Video: how to root a grape stalk - growing grape seedlings from chubuk