

Reproduction of juniper by cuttings: when and how to properly cut and root
You probably liked the juniper so much that you wanted to grow your own seedlings from cuttings that you take from a neighbor, in a city park, or simply cut your own favorite coniferous plant.
Next, let's talk about when and how to propagate a juniper by cuttings, what are the rules for successful cuttings and rooting.
By the way! The easiest cut juniper Cossackhowever ordinary also grafts well, for example creeping Blue Chip... But there are species that are very poorly rooted by cuttings, including such varieties rocky juniper, like Skyrocket or Blue Arrow.
Content
When to cut junipers in spring, summer and fall
In fact, juniper cuttings can be practiced all year round.
- Some people believe that the best time for cuttings is the beginning of spring (March-April).
- However, most often it is summer cuttings that are carried out in June-early Julywhen young shoots are just beginning to become lignified (they also say "semi-lignified shoots").
- Alternatively, you can propagate the juniper with woody cuttings in the fall, i.e. in September-October. In this case, the cuttings are rooted at home (on the windowsill).
- In general, you can also carry out winter cuttings, again at home, on the windowsill.
Note! There are no special differences in spring, summer, autumn and winter cuttings (except for choosing a place for rooting, because in early spring, late autumn and winter you cannot plant cuttings in open ground), but there are some nuances.
Video: winter propagation of conifers (thujas and junipers) by cuttings
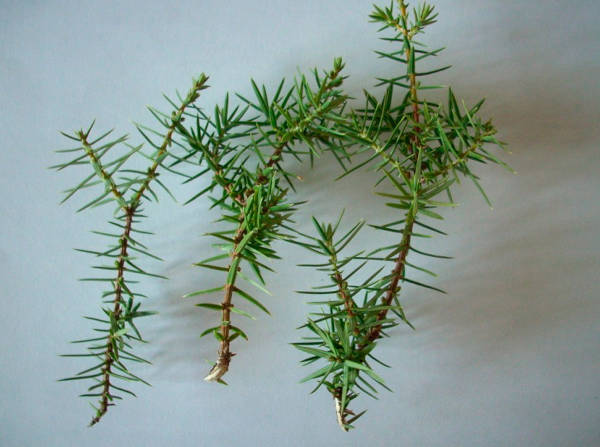
How to cut juniper cuttings
Advice! Harvesting cuttings is better early in the morning when it's not hot yetor during the day in cool and cloudy weather... The fact is that it was at this time in the branches maximum amount of moisture.
- For the convenience of subsequent grafting, you can immediately cut off a whole branch (one-year lateral shoot 30-40 cm long).
- And then already prepare small cuttings with "heels" (the lignified part of the shoot - a piece of last year's bark).
It is believed that cuttings with "heels" are best rooted, which you need not cut off, but tear off with a sharp downward movement, capturing part of last year's wood.
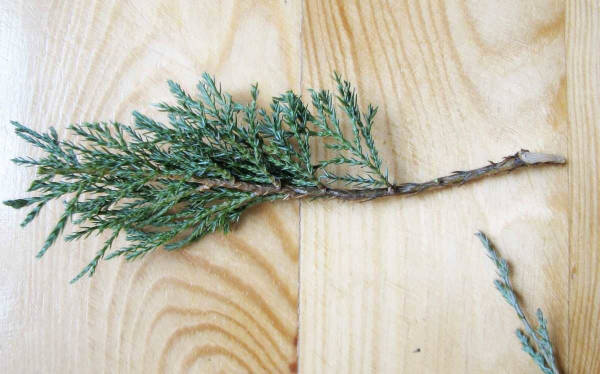
- Remove all needles from the bottom of the cutting, about 1/4 to 1/3 of its length (3-5 cm). You also need to trim the heels slightly if they are too long and / or with burrs.
The wounds that form on the part of the shoot cleared of needles will stimulate the early appearance of callus and roots.
- To reduce evaporation, it is generally recommended to reduce the volume of green mass, i.e. slightly trim the upper part of the cutting (but not the top-point of growth, but only the needles from the sides), but in the case of a juniper, this is not at all necessary.
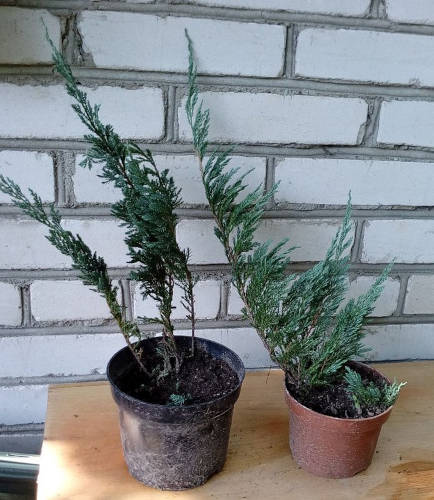
How to root juniper cuttings
Preparation of soil and cuttings
Naturally, it is very important to prepare a soil mixture suitable for rooting cuttings, which should be loose, moisture and breathable.
Alternatively, you can mix in equal proportions high-quality deoxidized peat, chernozem (or coniferous soil) and sand. Basically, you can just mix your garden soil and sand.
Advice! It is also highly desirable to add coniferous litter (forest floor) to the soil.
Immediately, the cuttings of juniper and, in general, all conifers should be planted in the ground as soon as possible.
If you need save the cuttings before planting, then sprinkle them with water, then wrap with a damp cloth, wrap in a bag and put in a cool place.
And just before planting, you can put cuttings in rooting solution (Heteroauxin, Kornevin).

But also better just dip lower part into powderso to speak "Powder" (first into the water, and then into the rooting agent so that the powder sticks better).
Terms and conditions for early rooting
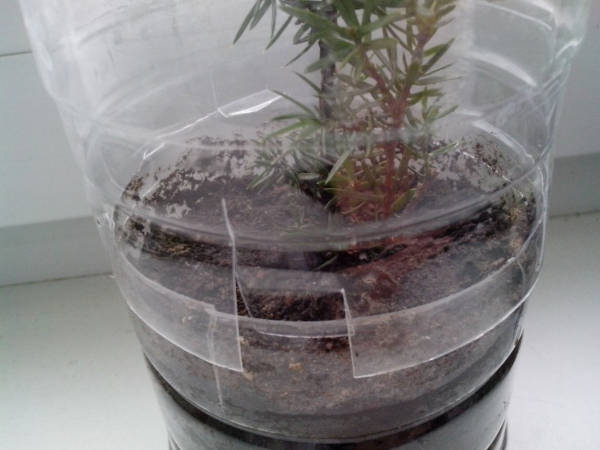
Most often, most gardeners root cuttings at home in pots or cups (be sure with drainage holes at the bottom).
However, it is very convenient to set aside a separate small area for rooting cuttings, to do so-called "Cuticle" or "shkolku"... Moreover, this place must be required protected from winds and being in the shade (for example, near a fence or any structure, in the shade of a dense crown of trees).
It will be just fine if you make a mini greenhouse (to better retain moisture and maintain the necessary conditions for early rooting), i.e. cover your "cuttings" with film or spunbond, then the cuttings will not need to be additionally covered with bottles (glasses).
- Prepare a "cuticle" / "school" or fill 0.5-liter pots (cups) with loose soil mixture.
It is always better to plant both cuttings and seedlings in moist soil.
- Insert the cuttings into the ground (to a depth of 1 / 4-1 / 3 of the cuttings length, i.e. 3-5 cm) at a slight slope (30-45 degrees), and then squeeze the soil tightly around the cuttings.
How far is it?
The main thing is that the cuttings do not touch each other. For example, under one 5-liter bottle you can easily place 4 cuttings, but no more.
- Water carefully and abundantly so that the whole earth is well saturated with water.
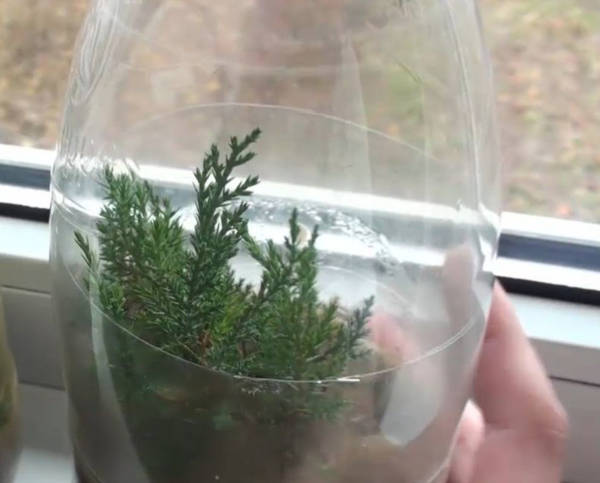
- Cover with cut plastic 5 liter bottles (or large plastic cups, 1.5-2 liter bottles, glass jars) to maintain high humidity inside.
Idea! You can water and ventilate through the lid, so cut bottles are the most convenient option.
- Ideal conditions for rooting are air temperature + 20-25 degrees (not higher than +30) and relative humidity of 95-100%.
In this case, the cuttings need exactly diffused light, in no case direct sunlight. Therefore, it will suit you north windowsill (northeastern or eastern), on a lighter windowsill they will need to be shaded with something.
- Accordingly, the main care that will be required of you is regular watering (in summer, in the heat, you will have to water every day) and maintaining moderate = sufficient humidity.
- The cuttings can take root only in wet soil, if the earth dries up, then the cuttings will dry out. But overflow and stagnation of moisture also cannot be allowed.
However! If you notice under the bottles (glasses) condensate, then you will need to quickly remove them (open the lid) and ventilate.
This is because low temperatures and high humidity (= condensation) can lead to rotting of the cuttings.
When to plant rooted juniper cuttings in a permanent location
The formation of callus and the appearance of roots can take from several months to a year, so transplanting juniper seedlings grown from cuttings to a new place can be done only next year... In this way, under favorable conditions, cuttings planted in summer and autumn can be planted as early as next spring.
Advice! The site has a separate article about how to properly plant a juniper in open ground.
Video: reproduction of juniper cuttings in summer