

Planting a thuja in the fall in open ground: when and how to plant a seedling correctly - a step by step guide
Summer is approaching its end, probably autumn has already come, and suddenly you suddenly felt a desire to complement or create a new composition of conifers in your garden. Or perhaps they decided to try to make a hedge, choosing a beautiful thuja for this.
Next, you will learn when and how to properly plant a thuja seedling in the fall, as well as what are the rules of post-plant care and cultivation, thanks to which your evergreen ephedra will be able to maintain its decorative qualities for many years.
Content
Thuja planting technology in open ground in autumn
When to plant in the fall, in what month: terms
It is impossible to give an unambiguous answer to the question of when is it better to plant thuja - in the spring or in the fall. Have spring and autumn planting has its own characteristics, advantages and disadvantages.
The main advantage of autumn planting is the abundance of planting material at normal prices, as well as the most favorable weather conditions for early rooting.
Since you decided to plant thuja in the fall, it is advisable to do this in it first half, you can even still at the end of summer. Thus, the approximate dates for planting thuja in the Central strip (Moscow region) is the end of August-September.
On the other hand, as many people assure (including the editor-in-chief of the Sadovy Mir magazine), late planting of thuja can be carried out in October (when the night frosts begin, but the ground will not freeze yet).
Video: late planting of conifers (for example, thuja)
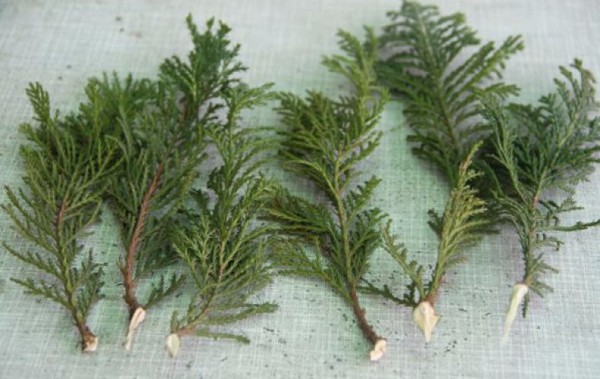
Selection of seedlings and varieties
A few tips for choosing a quality thuja seedling:
- The optimal age is up to 3-4 years.
The larger the thuja, the more expensive it is.
In containers, as a rule, they sell 15-25 cm plants (2 years old).
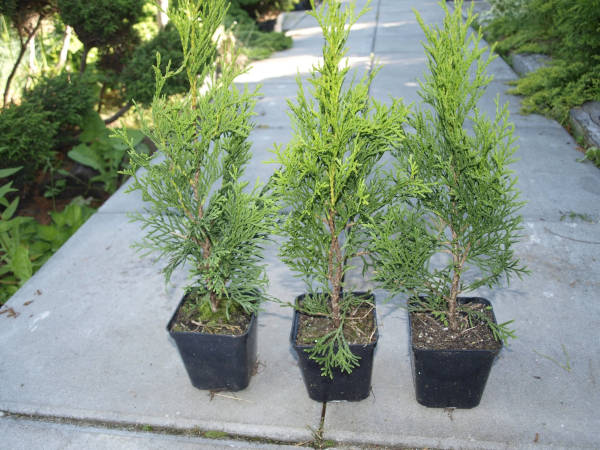
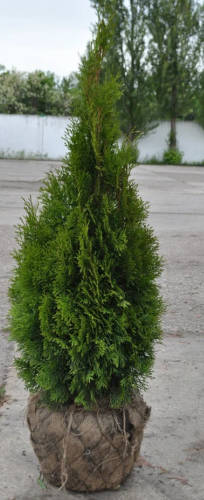
- Conifers with an open root system take root very poorly. Therefore, the seedling must necessarily be with a clod of earth (just in a container or wrapped in burlap).
Older and larger seedlings are usually wrapped in burlap.
- The color of the needles should be rich and match their variety.
- It is also worth paying attention to the presence and condition of a young growth (a seedling bought in the fall must have it).
If you notice that the seedling has a lot of yellow and dry needles, especially at the ends of the shoots, then these are clear signs that something is wrong with the plant. At the same time, the presence of dry needles inside the crown is by no means a reason to refuse a purchase.
- You can make sure that the plant is alive and healthy as follows: squeeze the top of the thuja into a fist, if after unclenching the branch returns to its previous shape, then everything is in order, if the needles begin to crunch or crumble, then you do not need such a seedling.
It is very easy to check that the seedling really grew in the container: you just need to lift it by the aboveground part. If he falls out of the pot, then the conclusions are quite obvious and sad (an unscrupulous seller put him there quite recently).
As for the diversity of species and varieties, in the conditions of the Middle zone (Moscow region), North-West (Leningrad region), as well as the Urals and Siberia, as a rule, only thuja is planted Western (the most popular varieties are Smaragd, Brabant, Danica, Teddy, Columna, Globoza, Woodwardy, Holmstrup, Tiny Tim, Golden Globe).
By the way! If you want to do hedge from thuja, then the most important criterion for choosing a suitable variety will be growth rateas well as general unpretentiousness and endurance. Brabant and partly Pyramidalis Compact are your choice. Of course, you can plant Smaragd or Columna, but they need to be planted closer, which means more seedlings will be needed.
Landing place
For normal growth and development, like most plants, thujas require a sufficient amount of light and heat.
Nevertheless, for thuja it is better to choose a place in light shade (partial shade), although it will grow well in the sun (with obligatory shading for winter-spring).
However! In the deep shade, the crown of the thuja will gradually become loose, the immune system will weaken, and resistance to all kinds of adverse conditions and fungal diseases will noticeably deteriorate.
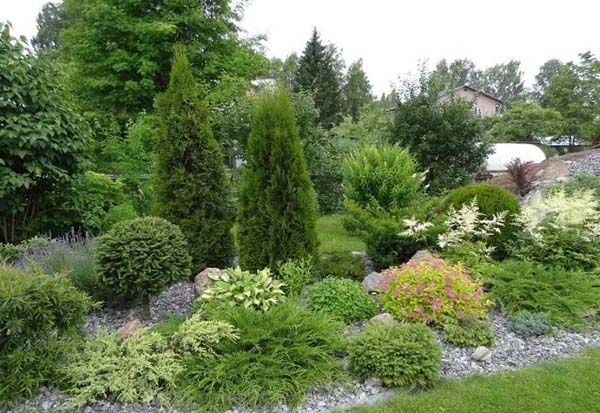
Try to create a whole composition of conifers by planting under them shade-tolerant plants.
Suitable soil
In general, thuja can grow on almost any soil. But, of course, it is better if the soil is moisture-consuming and breathable, i.e. ideally, it should be light loam or sandy loam soil.
On poor and sandy soils, which do not retain moisture at all, due to insufficient moisture, the thuja needles may turn pale.
So, if your soil is poor or too heavy (upper fertile layer), then its structure and fertility should be definitely improved by preparing a suitable soil mixture to fill the planting hole and fill the seedling.
In other words, you need to mix your garden soil with various soil improvers (humus, sand, coniferous litter).
If the soil is too sandy, then it is desirable to add more humus (rotted manure) or compost, if clayey, then - sand and peat.
It will not be superfluous if you add to the resulting soil mixture coniferous litter (which can be typed in the forest).
Also, if possible, you should add phosphorus-potassium (superphosphate and potassium sulfate), i.e. "Autumn" fertilizers.
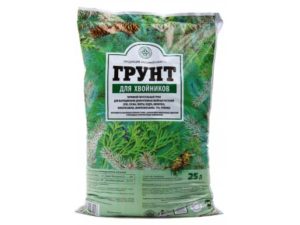
Advice! If you don't want to bother at all, then the easiest way is to buy ready-made soil for conifers.
Important! If you have medium or heavy loams, in other words, the earth is clay, then you need to make drainage, pour a 10-15 centimeter layer of gravel, expanded clay, crushed stone or broken brick.
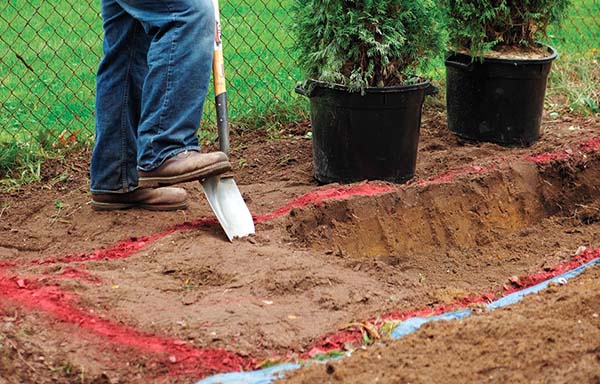
Landing pit
As a rule, for all plants with a closed root system, planting pits are simply made 2-3 times larger than the container (earthen coma). However, it is still highly desirable that the dimensions of the pit are at least 50 cm in depth and width (diameter). Moreover, if your soil is too clayey, then the pit should be made larger.
Advice! If you have planned to make a hedge from thuja, then it is more rational to make a trench, rather than dig individual planting holes.
Distance between seedlings
If you are going to make a hedge, then the optimal distance between the thuja will be about 80-120 centimeters.
Of course, thuja can withstand a more thickened planting, i.e. can be planted in 50 cm increments, but this only makes sense if you urgently need to get a dense green wall, while you have extra money.
Direct planting of a seedling
Step-by-step instructions for planting a thuja in open ground in the fall:
- Choose a place in advance, dig planting holes or a trench, fill it halfway with a fertile soil mixture.
- Remove the seedling from the container, after spilling it with water (you can add Kornevin or Heteroauxin).
If you have purchased a thuja with an earthen lump wrapped in burlap, then it is better to remove this burlap. The fact is that although it is a degradable material, it will take time, and with an autumn planting it is not.
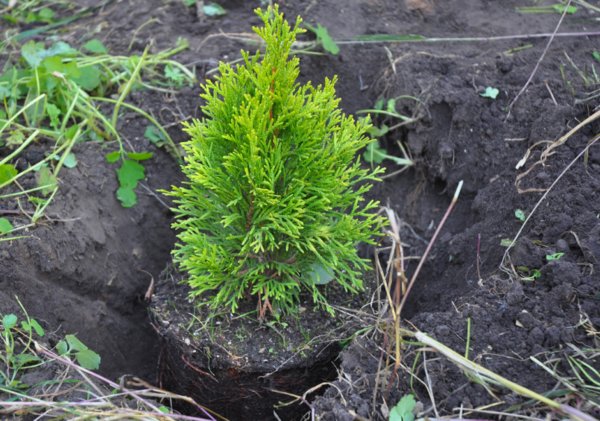
- As for the planting depth of thuja, the root collar should be at ground level.
The most important thing is not to deepen! Therefore, it is better to plant the seedling a little higher than necessary, i.e. initially, place the root collar 3-5 cm higher so that after the soil has shrunk, it in no case goes underground (deepens).
- Place the seedling in the hole.
Think! It is believed that in container plants it is advisable to knead the earth ball and roots, because this will facilitate a faster "emergence of the root system outside the old earth ball."
- Cover the seedling with soil mixture and tamp.
Thuja root coma should not be kept outdoors for more than 10-15 minutes, because it dries up very quickly.
- Spill abundantly with water (10-20 liters) to fill all the voids between the roots and the ground.
- If the earth settles, then add earth, compact it again and water it slightly (5-10 liters).
For better rooting, you can spill the thuja after planting with a solution of Kornevin or Heteroauxin.
- Mulch 3-5 cm (maximum - up to 10 cm). Peat, coniferous litter, coniferous bark, compost, humus can be used as mulch, sawdust, dry leaves.
Thanks to the mulch, moisture will last longer, which means that thuja will take root better and faster.
- Tie to the support.
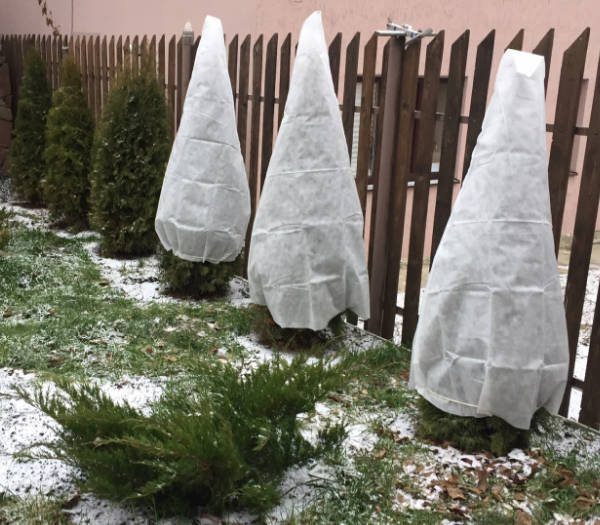
- Shade with a mesh or spunbond frame.
Moreover, it is advisable to leave the shading until spring so that the ephedra does not get burns during the winter-spring transition period.
Thuja care after planting in the fall and growing rules
Of course, thuja can be attributed to the category of unpretentious plants, which are quite easy to care for.
However! This does not mean at all that the ephedra will not need any care from you, except for watering.If you do not follow the basic rules of growing, then this can at least lead to a partial loss of decorative effect, and in extreme cases - to the death of the entire plant.
After the autumn planting, you will need water the plant regularly at least once a week, pouring out 1-2 buckets of water if the temperature is humid and cool. Or every 3 days if the fall is hot and dry.
And thuja are very fond of sprinkling (watering over the crown).
In the future, proper care for thuja in the garden should include the following activities (except for watering):
- loosening - for better air access to the plant root system;
And also weeding from weeds.
By the way! If you mulch the tree trunk circle, then you can water much less often, and the need for loosening and weeding may disappear altogether.
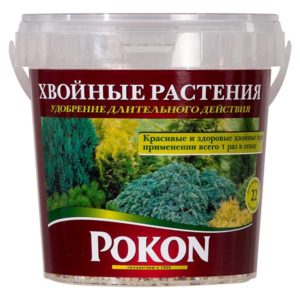
- top dressing (if necessary);
In the spring - purely nitrogen fertilizers, but complex fertilizers are better (for example, you can use nitroammophoska);
In late summer-autumn - potassium-phosphorus (potassium sulfate + superphosphate) or "autumn" fertilizers.
Just don't overfeed the thuja nitrogen fertilizers... Their excess can adversely affect the winter hardiness of the plant, because young shoots will not have time to ripen (lignify) by winter, which is why they will simply freeze out in winter.
And there are also special fertilizers for conifers.
- sanitary pruning (sick, dry, broken and damaged shoots);
They start pruning only a year after planting.
- haircut (in spring and autumn, at temperatures no higher than +28 .. + 30 degrees, in dry weather);
Important! You can only cut green parts (non-lignified young shoots). If you remove the lignified parts (perennial branches), then at this place you most likely will form bald patches that do not overgrow for a long time (“bald patches”).
- protection and shelter from sunlight (burns in the winter-spring period).
Thuja, like other conifers, is highly frost-resistant, so there is absolutely no need to insulate it from frost.
And in the future, if you you will need to reproduce thuja "for free"then you can carry out grafting.
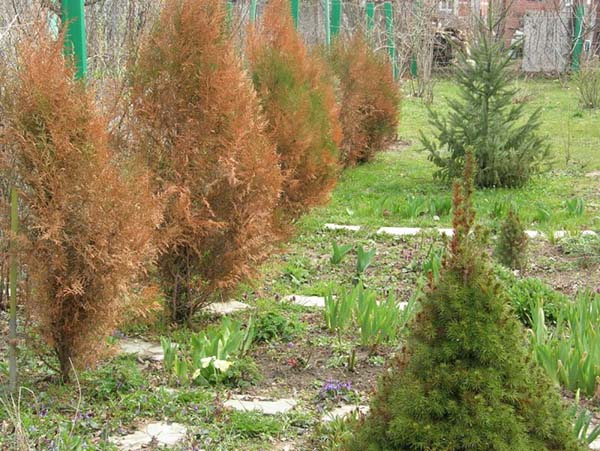
Perhaps the biggest challenge that novice gardeners face is yellowing of thujawhich could be caused by natural process of changing needles (the dying off of the old and the subsequent formation of a new one), sunburn or a dangerous fungal disease.
Advice! On the reasons and ways of solving certain problems with yellowing of thuja needles detailed in this material.
Well, we hope that thanks to the advice of our article, your thuja will definitely take root well and next year will start to delight you with young shoots and green needles.
Video: autumn planting of thuja
Thank you! I will definitely take your recommendations into account when planting a thuja, which I have been dreaming of for a long time. Everything is very detailed and understandable.