

Timing and methods of reproduction of thuja by cuttings (branches) at home
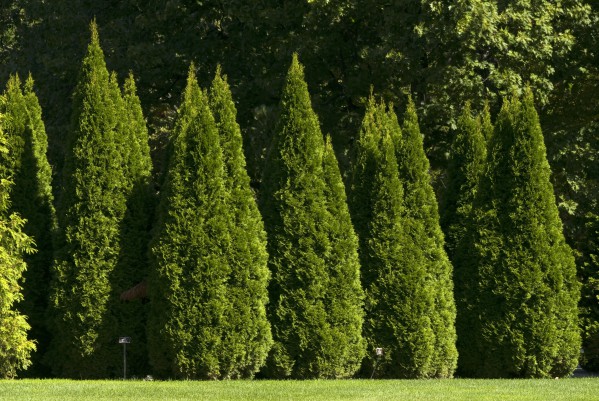
The evergreen beauty has many fans all over the world. Many owners of summer cottages and household plots are happy to decorate their territories with this culture, and therefore the question of the reproduction of ornamental shrubs does not lose its relevance.
Next, you will find out when and in what ways you can propagate thuja by cuttings.
Content
When to graft thuja: optimal timing
On the question of when it is better to propagate thuja by cuttings at home: in spring, summer, autumn or winter, experts have slightly different opinions. Someone argues that it is better to do this in winter, while someone claims that the ideal dates are in the spring.
But despite such disagreements, the propagation of thuja by cuttings in the summer is the most optimal option.The thing is that the event, held in the summer, makes it possible for the twigs of the bush to fill up with strength, adapt and root normally for transplantation to a permanent place in the next season.
Important! Propagation of thuja at home by cuttings in the summer should be when the growth of shoots has stopped.
How to cut thuja cuttings correctly
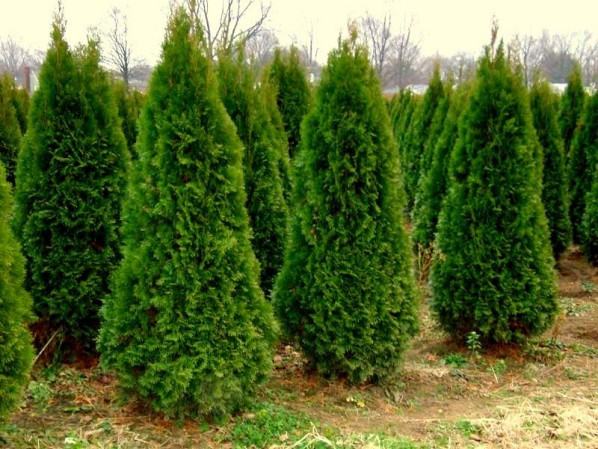
A normally developed skeletal branch in the upper part of the shrub is ideal for propagation of thuja by cuttings. For cutting, you should choose two- or three-year-old lignified growths about 10-15 centimeters long, which are located at the ends of the shoots.
The stalk must be torn off sharply together with a small piece of wood with last year's bark, which is called the "heel" (it is recommended to tear it from top to bottom). Thanks to the "heel", the branch will be able to take root sooner, since it contains useful substances that the plant has managed to accumulate. When peeling the bark on the handle, you need to lightly clean this place with a knife.
In the photo, a correctly cut thuja stalk:
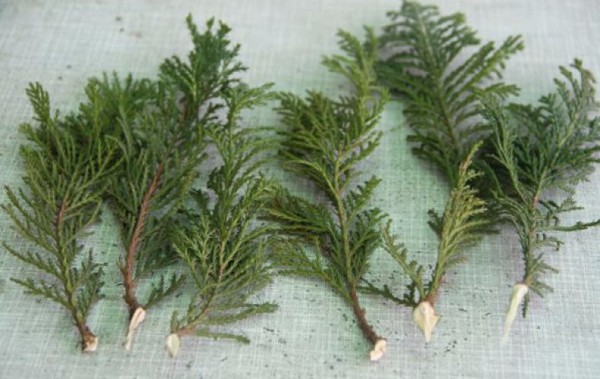
Advice! In case of severe lignification, you can use a pruner, it will help to carefully remove the material.
How to prepare thuja cuttings for rooting
First of all, excess needles should be removed from the cutting in order to prevent decay. To do this, you need to cut off the branches from the bottom and slightly peel off the bark. And with an abundance of branches, you can make the needles a little shorter in other places.

After these manipulations, the branches must be placed in a solution of the drug for about 12 hours to stimulate growth and root formation (for example, "Kornevin" or "Heteroauxin").

Note! Cuttings should not be stored as they may deteriorate and become unusable for planting. But if for some reason you are not able to rooting, you can wrap the branches with a damp cloth, wrap them in a bag and put them in a cool place.
Soil preparation
It is optimal to use light soil with good drainage properties or ordinary river sand as a soil for rooting cuttings (the main thing is that it is clean). If the first option suits you more, then you can prepare the substrate yourself: you should mix sand, peat and forest soil (black soil) in equal proportions.

Containers with a shallow depth can be used as landing containers. They must have drainage holes. Seedling containers or trays are ideal for this purpose.
When using sand, it must be boiled for five minutes before use and be sure to cool.
Immediate rooting process
When rooting thuja cuttings, you must adhere to the following step-by-step instructions:
- Treat the tips of the cuttings in one of the rooting stimulants.
- Insert them into the ground at a 45 degree angle to a depth of about 2-3 centimeters. The optimum distance between cuttings is 5 centimeters.
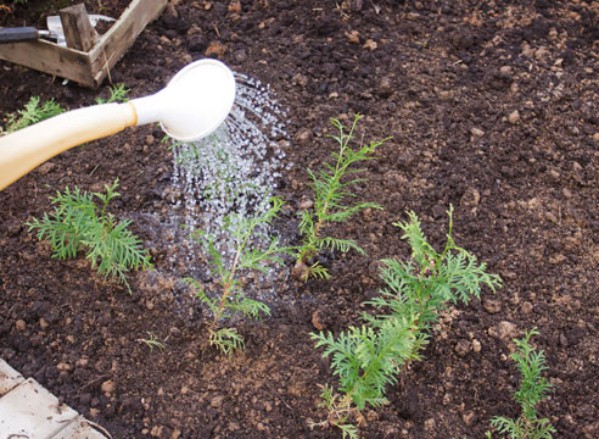
- Then lightly compact the soil around the cuttings and water the plant.
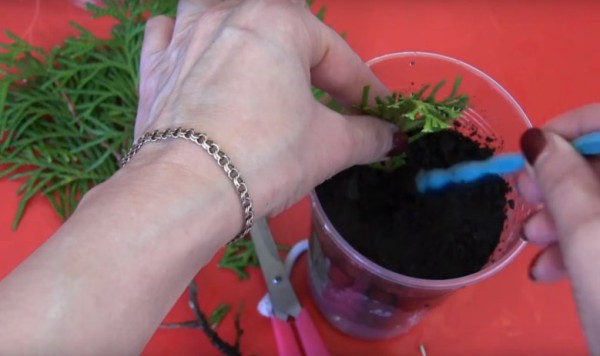
- Cover the containers with plastic wrap or plastic bag, or place the branch in a plastic cup and cover with the same cup on top..
Note! When new shoots begin to appear on the cuttings, this will mean that rooting was successful.
Video: rooting of thuja cuttings in a glass.
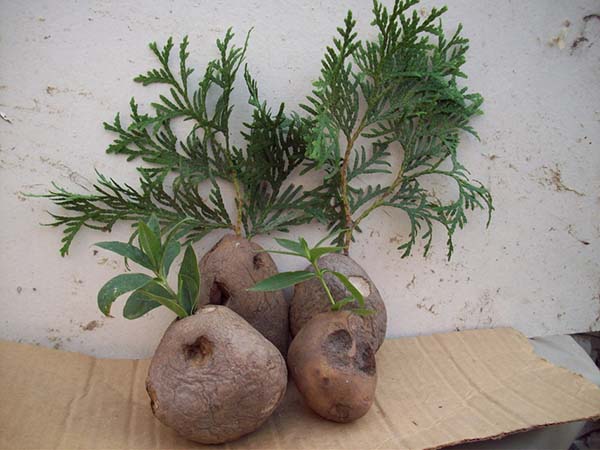
Non-standard method of rooting cuttings in potatoes
Some gardeners also practice another no less interesting way to propagate thuja by cuttings - rooting in potatoes. Potato nutrients and starch work well on the twig, helping to root successfully.
To do this, take a few healthy, fresh potatoes, wash, remove the eyes, then make a hole about 4 cm long in them with a nail. After that, you need to place the thuja stalk in the hole of the potato. Pour some fertile soil into wooden crates and place the potatoes in the soil.Cover the potato stew with a cropped plastic bottle. Then you can unscrew the bottle cap and water.
There is also a method of rooting in a jar of water, but it is not very productive, it is better to do this in a substrate.
How to care for planted thuja cuttings before planting in a permanent place
Optimum temperature - +20-25 degrees. Humidity should be high - about 90%. The container with cuttings should be placed in such a place where there will be diffused light (direct rays are dangerous!). And the greenhouse itself must be regularly ventilated.
The plant should be watered as carefully as possible to avoid exposing the "heel". A spray bottle is ideal for delicate watering. Water only when the topsoil or sand dries up, and remember that too much moisture can negatively affect the plant.
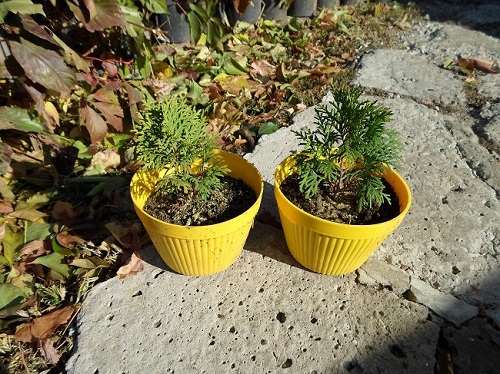
After successful rooting, the cuttings should be transplanted into open ground on a special bed.
Video: rooted cuttings of thuja smaragd four months after planting in open ground.
Important! In late autumn, around November, small thujas should be covered, more precisely, mulched and shaded.
After the winter cold, the covering material can be removed. But you need to do this only if you are sure that the frosts will not return. Continue to take care of the thuja cuttings earlier.
Note! You can land on a permanent site in about a year.
If you dream of decorating your plot with lush and luxurious shrubs, then the method for propagating thuja with cuttings is perfect for you. It can be done independently at home without any problems and difficulties. This method is inexpensive and economical, and if done correctly, it gives excellent results. Good luck in breeding and growing thuja!
Video: how to properly propagate thuja by cuttings at home